Extracting Router Firmware Using SMD Grippers
A few months ago, I was tinkering with my old router and started wondering how I could extract its firmware. I was curious if it was possible to reverse engineer it and find any security flaws. Even though it’s a pretty outdated device, I figured I could still learn a lot about hardware hacking—especially about how firmware extraction works.
So, what is firmware exactly?
Firmware is a low-level type of software that runs close to the hardware. It’s usually written in languages like C or assembly, giving it more direct access to memory and system resources. You’ll find firmware in all sorts of embedded devices—routers, printers, IoT gadgets, and so on.
In this post, I’ll show you a quick guide on how to extract firmware from a router’s flash memory. Later on, I might dive deeper into how to analyze it.
What You’ll Need
Software
- binwalk
- flashrom
You can easily install both tools on your favorite Linux distro.
- Debian-based systems
1
sudo apt install binwalk flashrom
- Arch-based systems
1
sudo pacman -S binwalk flashrom
Hardware
- A target device
- CH341A Programmer
- Screwdriver
- SOIC to DIP8 adapter
- Jumper wires
- SMD Grippers
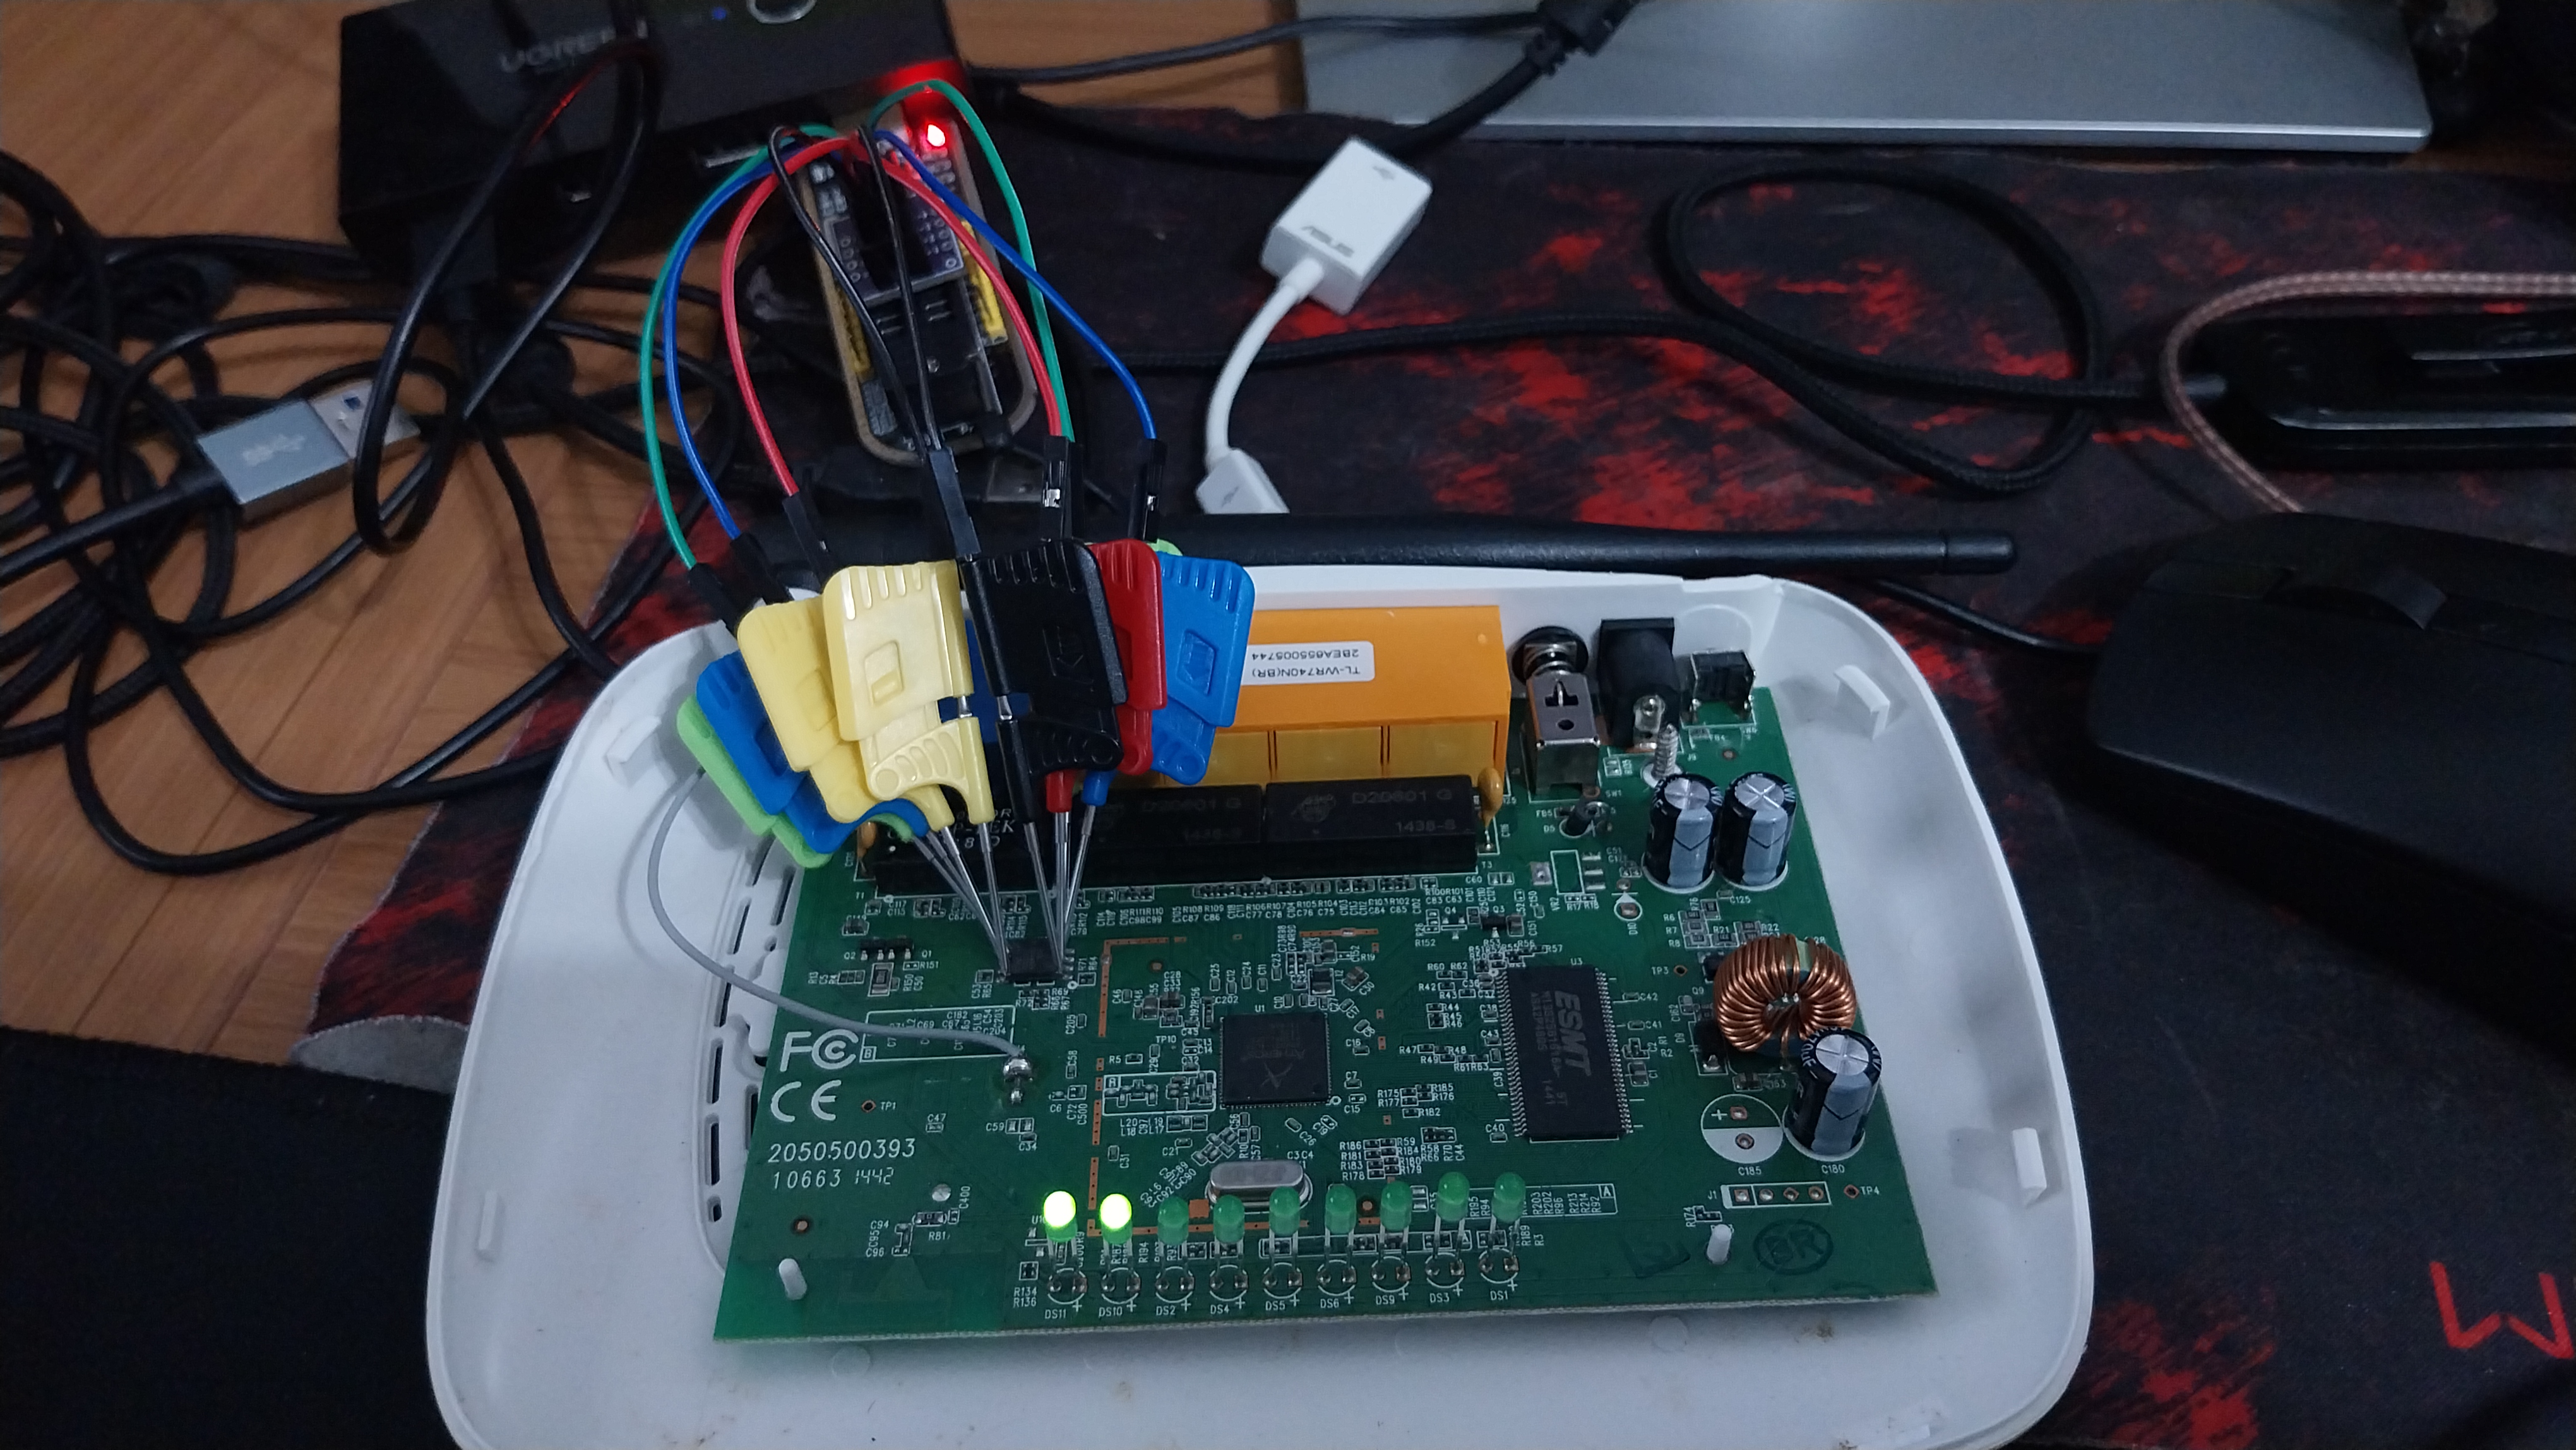
In my case, I used a TP-Link TL-WR741N, but you can use pretty much any router or embedded device. The CH341A is a low-cost USB programmer commonly used to read and write SPI flash memory. For connecting to the chip, you can use a SOIC8 test clip, an online test probe, or any similar extraction tool that fits the chip’s package.
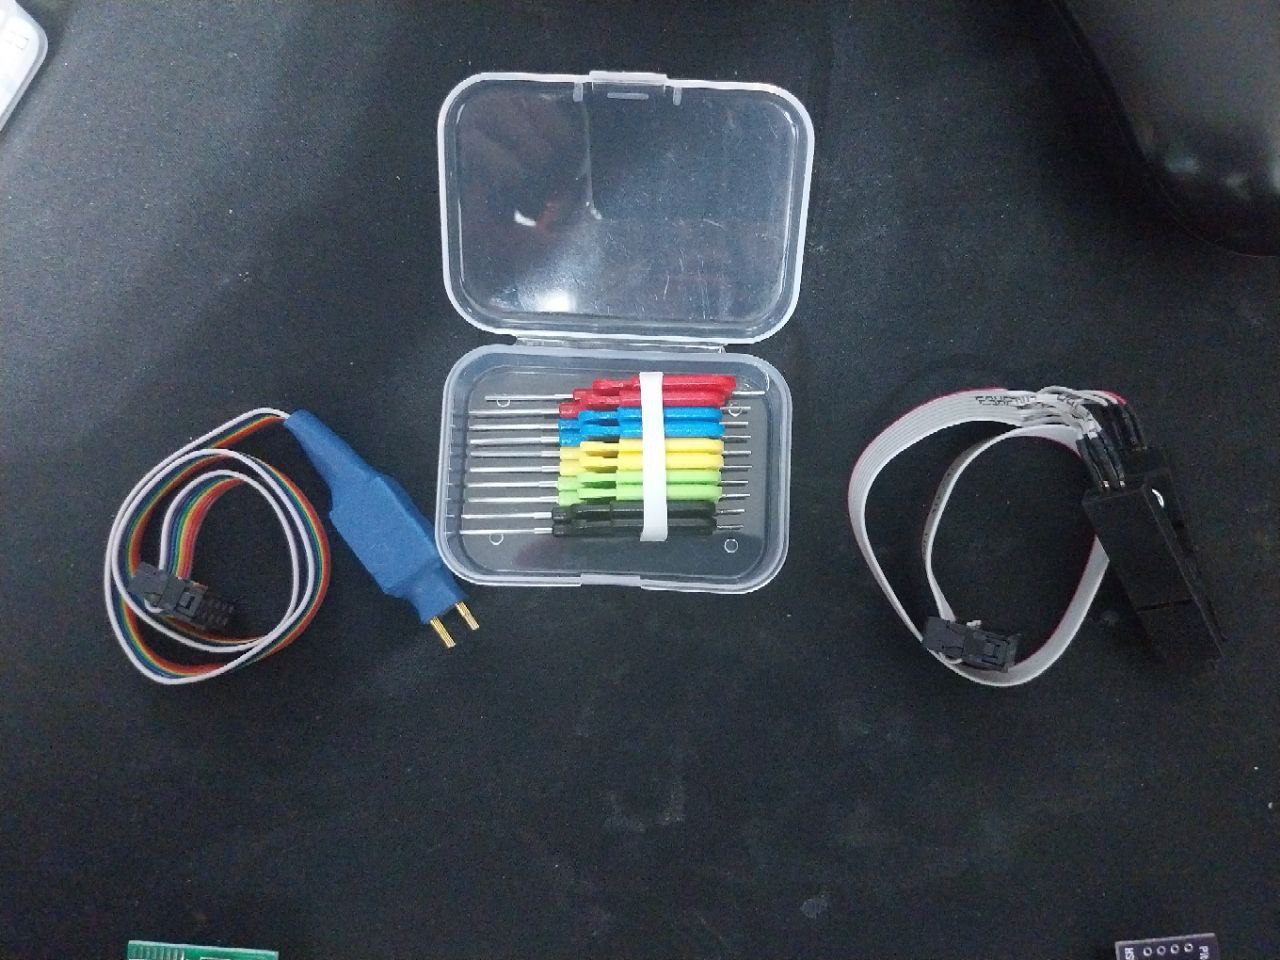
For example, in the image, you can see an online test probe on the left, SMD grabbers in the center, and a SOIC8 test clip on the right.
Firmware Extraction
First, we need to physically access the flash memory inside the router. Start by using a screwdriver to remove the screws and open up the case.
Once the router is open, look for the flash memory chip—it’s usually an 8-pin SMD (Surface-Mount Device) chip. You’ll need to identify it correctly; most of the time, there’s a small dot or notch on the chip indicating pin 1, which is important when connecting it to the programmer.
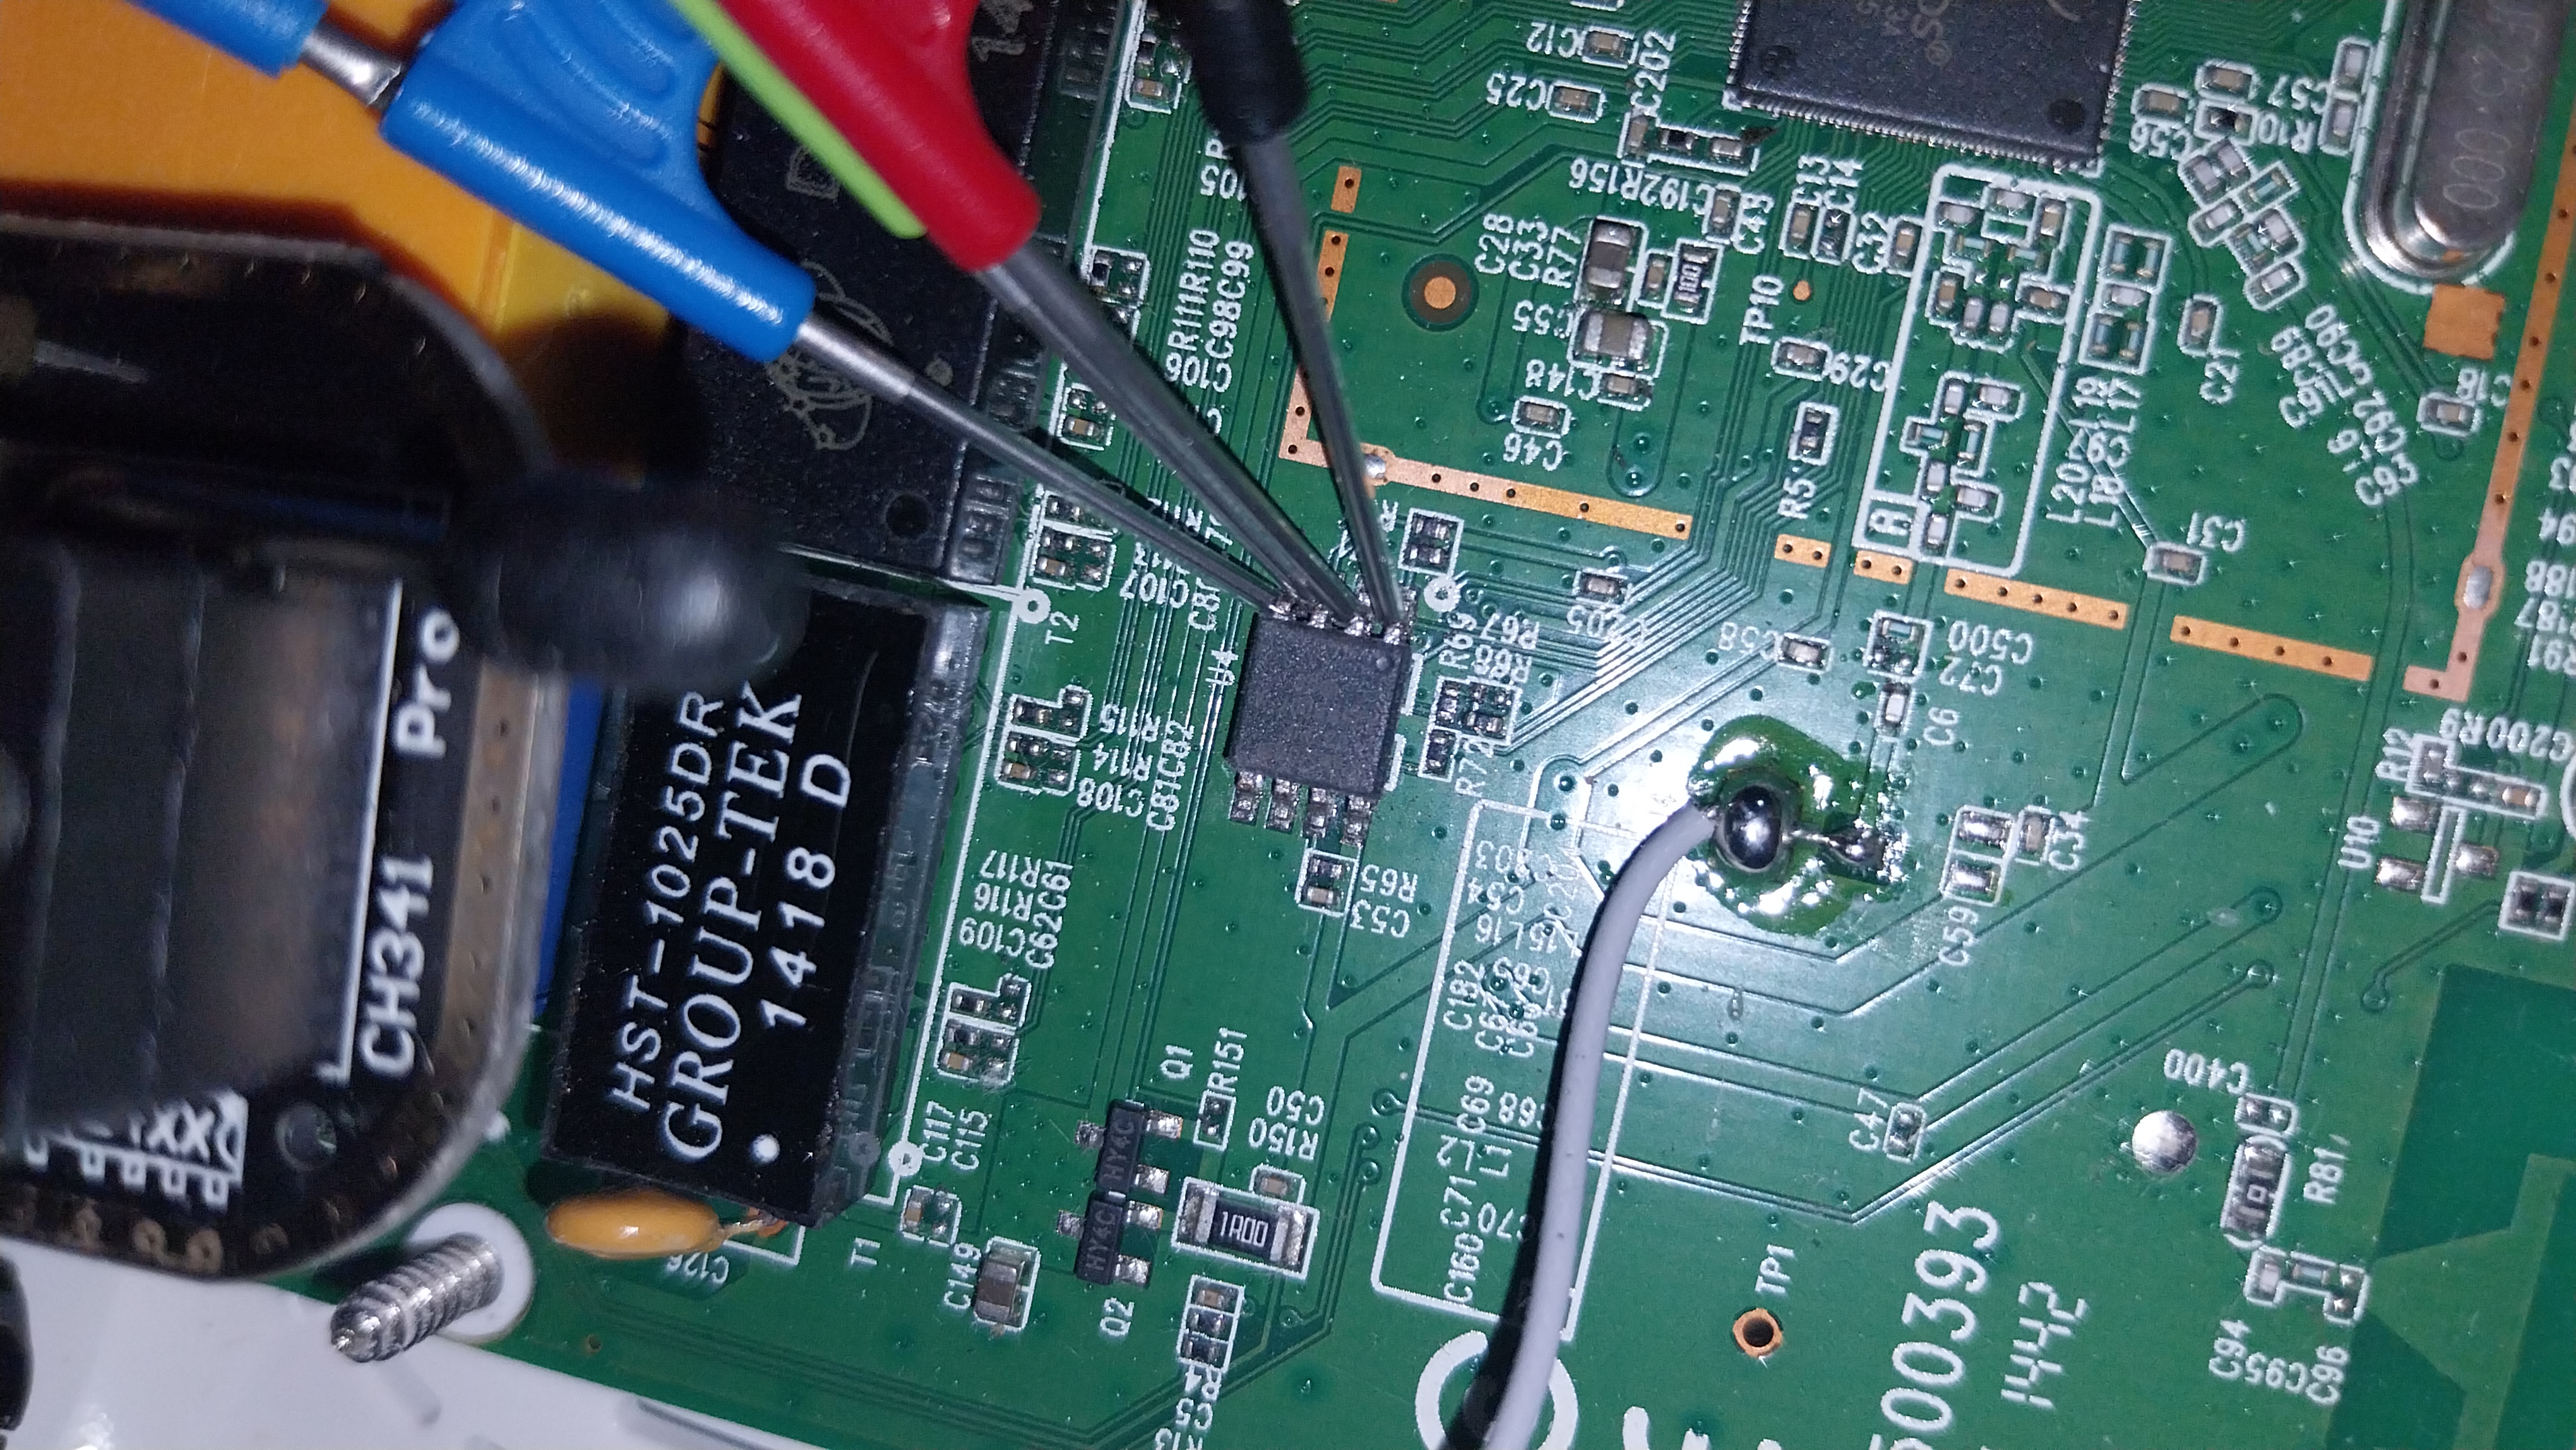
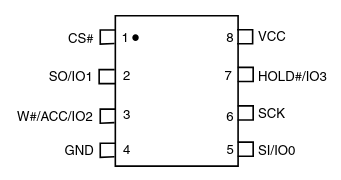
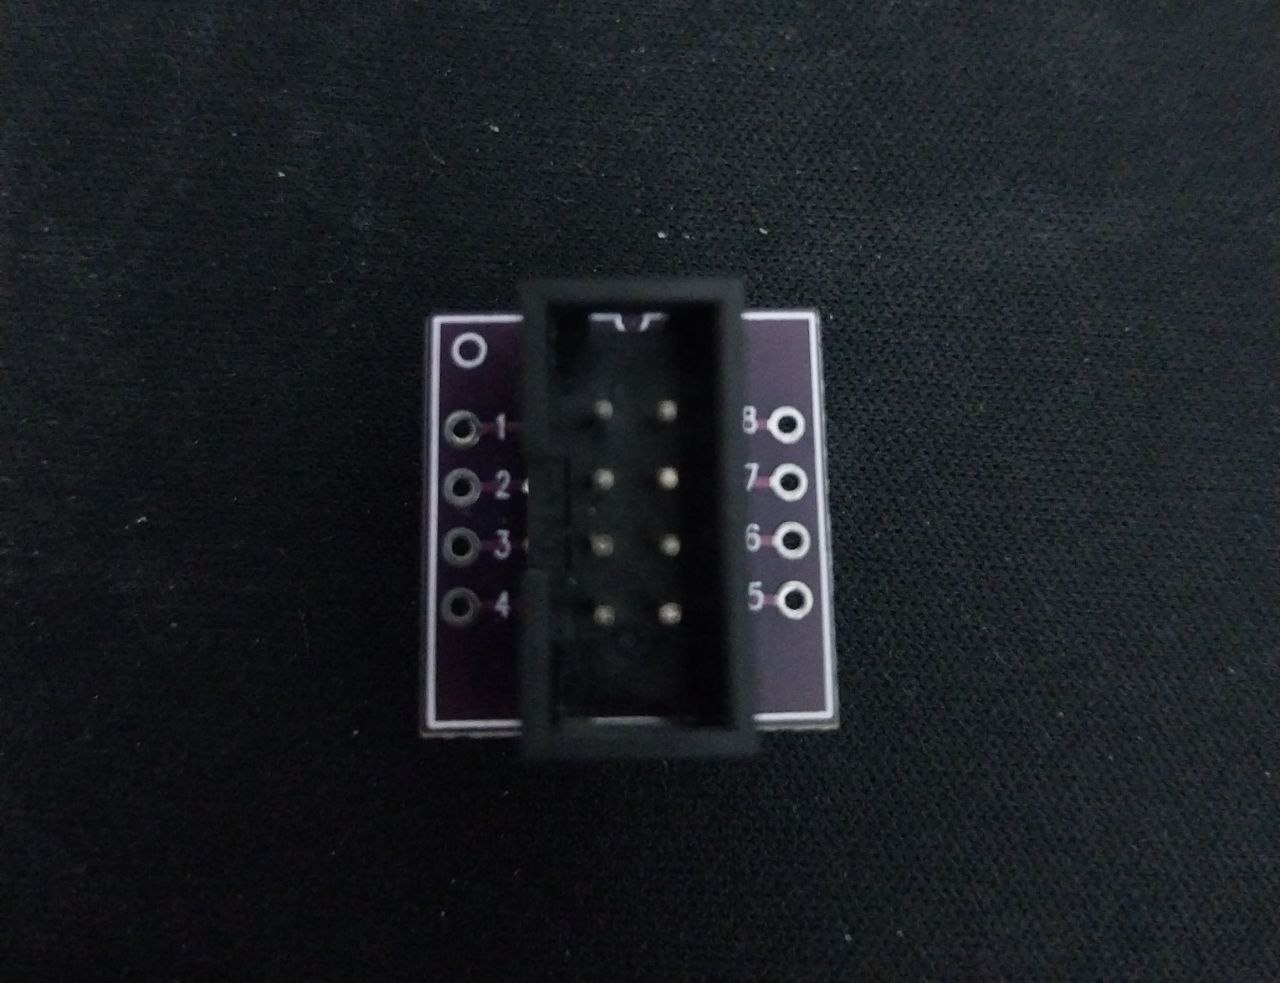
When we use SMD grippers, we need to have a little patience and dexterity to connect them, but eventually everything will be properly connected. Then we insert the jumpers into the SOIC8 to DIP8 adapter (pay attention to the numbering on the adapter to connect it correctly—pin 1 of the chip goes to connection 1, and so on).
After that, we need to connect it to the CH341 programmer. Again, we need to pay attention, but this time to a different detail. If our chip is a 24xx or 25xx series, this indicates the type of memory it uses: If it’s a 25xx series, it’s an SPI (Serial Peripheral Interface) flash memory. If it’s a 24xx series, it’s an I²C (Inter-Integrated Circuit) EEPROM, which communicates over the I²C protocol.
In our case, the chip is from the 25xx series. After everything is connected, we can plug the programmer into our PC.

Below is what the setup looks like. I’ll admit mine is a bit messy, but the important thing is — it works!
flashrom
After that, run the following command in your terminal window:
1
flashrom -p ch341a_spi -c "S25FL032P" -r firmware.bin
If your programmer is not the CH341A model, replace ch341a_spi with the device name you are using (make sure it is supported by flashrom).
Similarly, if your target device does not have the S25FL032P chip, replace it with the appropriate chip name for your case.
Once flashrom finishes running, we will have successfully extracted our router’s firmware. Next, we can proceed to analyze it with binwalk.
Binwalk
To analyze the extracted firmware, run the following command:
1
binwalk firmware.bin

If you want to extract the binary’s contents to analyze its files and data in more detail, run:
1
binwalk -e firmware.bin
So, what’s next?
There are several things we can do with this firmware and the old router.
- Analyze its firmware to identify potential security flaws
- Reverse engineer it using tools like Ghidra, IDA Pro, or simple hex viewers like xxd
- Install alternative firmware such as OpenWRT or pfSense on the router (check current supported versions)
I hope to reverse engineer this firmware and bring you those projects in the future. For now, I hope this guide was helpful. Thanks, and see you next time!